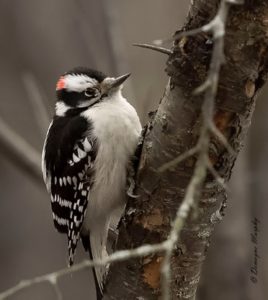
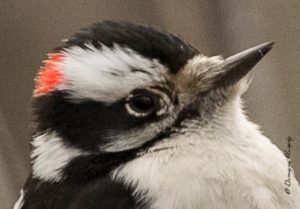
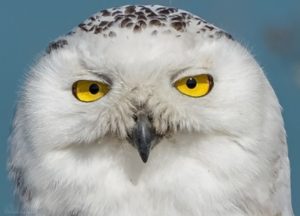
Upon first glance this photo, taken without any support, appears sharp. However, if we take a close-up cross section-below-we can see that it is disappointingly soft.
I’m going to start this third article by assuming you’ve now become hooked on bird photography. So on we go! You’ve tried lots of photos maybe using the beginning settings I laid out in last month’s article. Hopefully you’re getting enough light in your images. But maybe you’re still not getting acceptable sharpness? We could at this point address the Exposure Triangle-the interrelationship between Aperture, Shutter Speed And ISO-knowing that shutter speed is an important factor in sharpness. But I think we should first talk about camera support. I think this may ultimately be more important for most of us when talking about sharpness.
Most digital camera systems are still quite heavy. The Canon 7d MKII paired with the 100-400 MK II lens weighs in at about 5.60 pounds. A similar Nikon setup would also top 5 pounds. You are then expected to hold this horizontally for long periods of time while you are aiming and shooting. And don’t forget you still have to breathe during this process. So unless you are physically capable of holding this equipment rock steady you are going to get image blur to some extent. I learned pretty early on that even if I had enough light to get very fast shutter speeds I was still getting a slight softness in my images. And digital images are very unforgiving of blur. We can all easily enlarge images to see exactly how sharp a photo is. So even if you captured a fantastic image you will be disappointed if it isn’t tack sharp.
This is not to say that it is impossible to shoot hand-held, without some sort of support. Some photographers do this amazingly well as you will see below. But for many of us it simply isn’t possible. This was a hard lesson for me to learn as I value mobility. I like to walk longer distances; I like to climb up on things or get down onto the ground for different vantage points. So carrying my rig mounted on a tripod just doesn’t appeal to me. However, frustration with unacceptable image softness finally forced me to at least make the compromise of using a monopod. And that is how I currently shoot; but I know that eventually I will need to shift to a tripod to get the sharpness I want in more of my photos.
A monopod has the advantage of light weight and easier maneuverability over most tripods. It also uses a simplified head-the piece that mounts the camera to the monopod so it is very easy to operate quickly. It does however lack the stability of three legs. This is the choice I would encourage you to make next. Invest in a monopod or a tripod. You should decide on the amount of stability you think you need (possibly based in part on your physical condition) vs. how important maneuverability/added weight are to your shooting style.
In spite of the internet advice available, I don’t believe it is necessary to start with something hugely expensive. My monopod costs roughly $90 plus another $115 for the head. The tripod used by Emil below costs about $279 in the carbon fiber version (very lightweight) and this includes the ball head. The aluminum version clocks in at about $150 including the same head. I have listed the models below. Yes, you can easily spend $700 on a carbon fiber tripod and another $600 for the head. But it simply isn’t necessary at this point. Aim for the quality you can easily afford. And save the rest of your money for a birding trip!
One thing you should take note of when purchasing a mono or tripod is the height of the support in relation to your own height. You want to be able to mount your camera and have the support extend vertically to a level that is comfortable for you to see through your viewfinder without bending down at all. And you should not have to extend the center column of the tripod all the way to its maximum to do this. When the center column is fully extended the tripod becomes unsteady with the weight of your camera perched so far above the three legs. So do take note of the height of the tripod with the center column maybe less than halfway extended. The other critical factor is the load capacity of the support. You must choose a model that can support at least the weight of your current camera/lens combo. If in doubt go up in support weight rather than down.
A lesser consideration would be how many leg segments the support uses and the type of locking mechanism for the legs. In terms of segments-the more segments the smaller the folded length-so it is easier to store and carry when folded up but the longer it takes to extend it in the field. Conversely, fewer segments take less time to extend but have a longer folded length. The segments will then be locked with either twist locks or flip locks. These factors seem to come down largely to matters of personal preference.
You must then purchase a head-the piece that connects the camera to the support. Monopod heads are quite simple in that they only need accommodate movement up and down. If you want to move your camera left/right you simply twist the whole set up. I would actually advise not purchasing some of the cheap tilt heads from Oben or Manfrotto-the under $100 category. Do spend a little more and get a 90 degree tilt head from Sirui or Kirk or Really Right Stuff (Sirui being the budget version of this trio-but highly acceptable.)
Tripod heads come in quite an array of styles-and prices. A ball head is what you are looking for (avoid pan and tilt or geared heads which are not suited for this kind of photography; and gimbal heads are generally used for 500mm or longer lens set ups.) Again, stay away from the under $100 heads.
Below I’ve included some additional examples of shots taken with and without supports so you can judge for yourself. See you out there!
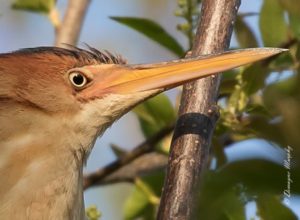
Canon 7D Mk II, coupled with Canon 100-400 Mk II.
Oben CTM-2400 4-Section Carbon Fiber MONOPOD, retail $90 and Sirui L-10 Monopod Tilt Head, retail $115
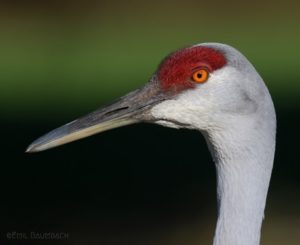
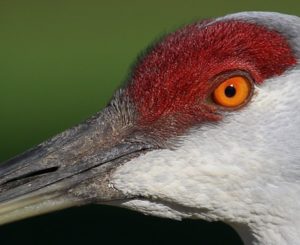
Canon 7D Mk II, coupled with Canon 100-400 Mk II and 1.4X telextender.
MeFoto Roadtrip carbon fiber TRIPOD (retail $269) which includes the MeFoto Q1 ball head.
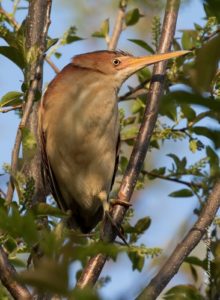
Given that there is always an exception to any rule I have included the below photo which was taken handheld. It is satifyingly sharp. But again-I think this to be the exception to the rule. Well done Leo!
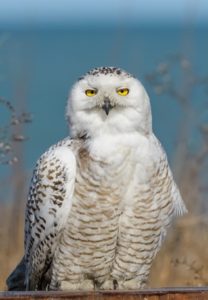
Nikon D500 paired with the 200-500mm lens and HANDHELD.
by Demayne Murphy